Check Quantity, Tile Code, and Production Batch
- The first rule upon receiving floor tiles is to immediately check the tile code and production batch (usually printed on the box); if there is an error, request an immediate exchange from the seller.
- Packaging Specifications: Floor tiles are usually sold per m2, while Vietnamese tiles are often sold by the box. Therefore, you need to clearly understand the box packaging specifications to calculate and convert the quantities accurately. 60×60 tiles are usually packed at 4 pieces per box (equivalent to 1.44 m2). 80×80 tiles have 3 pieces per box (1.92 m2), and 100×100 tiles have only 2 pieces per box. For 30×60 wall tiles, on average 1 box contains 8 – 9 pieces (1.44 m2 or 1.62 m2).
- For floor tiles, you should purchase an extra 1 – 2 boxes to prepare for future replacements. Since tiles are produced in batches, it is very difficult to find the previous batch if the need arises later. The color deviation between two tile batches can be up to 20%.
Preparation Stage for Tiling
- Tiles must be stored in a dry, clean, and flat place, stacked no higher than 1.5m to avoid cracking, chipping, or collapsing.
- Inspect the tiling surface and prepare the installation materials. Check the length and width dimensions of the area to be tiled to calculate and mix materials in appropriate quantities.
- There are various materials for tiling, such as tile adhesive, cement mortar, etc. Materials used for tiling require a setting time. The setting time varies depending on the type of material. Note to avoid walking or placing heavy objects on the newly tiled floor too early, which causes the tiles to peel or loosen.
- Thoroughly clean the floor and walls intended for tiling. The substrate must be compacted flat and solid. Check the flatness with a spirit level.
- Soak the tiles in clean water for at least 15 minutes before tiling or cladding to ensure optimal adhesion for the construction.
When the base is dry, clean it, wet it lightly, and apply a mortar/adhesive layer about 10mm thick to prepare for tile placement. - Do not spread the adhesive layer over too wide an area because if not tiled in time, the adhesive layer will dry out, compromising bonding strength.
- Cut tiles or defective tiles should not be installed in the most visible and easily noticed areas.
Important Notes During Tiling
- Spread out floor tiles on a flat surface of about 10m2 for pre-installation inspection.
- Arrange tiles in the correct orientation according to the design of each tile pattern. For full polished porcelain tiles, there is always an arrow embossed on the back indicating the tiling direction. Ensure all tiles are laid in the same direction to achieve the highest aesthetic appeal.
- Check for color deviations (if any), necessary joint widths, and required cutting lines suitable for the area of use.
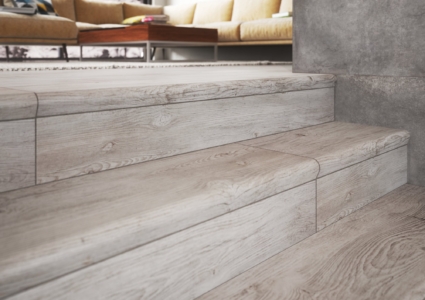
- Before tiling, refer to the layout method: tiling with grout lines or tight joints, continuous or staggered, parallel or diagonal. For ceramic tiles, there is an allowable tolerance, typically leaving a grout line of 3 to 5mm. Specifically, wood-look tiles should be laid in a 1/3 offset pattern, meaning the position of the second tile aligns with 1/3 of the first tile.
- String lines: choose a convenient location. Place the first tile according to the predetermined corner, then place subsequent tiles aligned with the first: you can insert tile spacers of the specified size so that the tiles and grout lines do not deviate. Use a rubber mallet to tap lightly on the tile surface to create a uniform, flat floor.
- Avoid or limit stepping on the tile surface during installation; if stepping is necessary, wide and thick wooden boards must be placed over the tiles.
- Use a specialized notched trowel. Create an even layer of adhesive so that when laying the tile, the substrate will not have voids, air pockets, or water bubbles. Wipe clean as you go to prevent cement water from staining and soaking into the tile surface, making it difficult to clean when finishing. Do not walk on or place heavy objects on freshly tiled floors for at least 9 hours…
- After tiling is complete, choose the appropriate grout powder and color depending on the tile color. Before grouting, clean out the grout joints thoroughly using slim tools to ensure optimal bonding between tiles.
- Note: when grouting, place wooden boards on the floor before walking across to avoid the risk of tiles detaching from the substrate; wipe clean immediately as you grout to avoid staining the floor.
- Use mild detergents to clean stains. Note: Avoid highly acidic, abrasive, and harsh detergents; while they may not damage the tiles themselves, the acid will damage the cement mortar and grout. Also note that when using cleaning agents, you must immediately rinse/wipe down with clean water.
Usage and Maintenance
- For polished porcelain tiles or higher-end options like microcrystalline tiles, never drag heavy items or metal objects (iron cabinets, beds, tables, chairs…) across the tile surface as this can create long scratches and degrade the aesthetic quality of the tiles.
- When difficult-to-clean spills occur (coffee, ink, dyes…), clean them up immediately; do not let them sit for a long time as they will form stains that are much harder to remove.
- When cleaning, do not use highly abrasive materials such as metal scourers, sandpaper, grinding stones, etc. This applies especially to glossy tiles or easily scratched tiles, which could lose their shine.
- Abrasive dirt particles (sand, dust) increase wear and tear from foot traffic friction. Therefore, keep your floors as clean as possible.
How to Accurately Calculate the Quantity of Tiles to Buy
- You can calculate the required tile quantity by using a tape measure to measure the surface area (floors and walls) you plan to tile, or by reading the architectural drawings. For floor tiles, simply multiply the length by the width of the floor to get the total surface area to be tiled. Remember to subtract any areas that do not use floor tiles if the room design features columns or other architectural elements (staircases, water features, kitchen counters, toilets, skylights, or decorative landscaping). In cases where decorative tiles are used, you must also estimate the quantity of border or corner tiles (calculate total linear meters of border tiles and total pieces of corner tiles). The quantity of main tiles needed will be reduced by an area equivalent to the decorative tile area.
- For wall tiles, add the length and width of the room together, multiply the sum by two, and then multiply by the height of the wall section you wish to tile. From this result, subtract the area of doors and/or windows within the height range of the tiled wall. If using decorative wall tiles (top/bottom borders, accent tiles), measure the room’s length and width, sum them and multiply by two, then subtract the width of doors and/or windows if the border line is interrupted by these openings. The resulting linear meters needed, divided by the length of one border tile piece, will tell you how many border tiles are required.
- Note when choosing tiles: the size and pattern of decorative tiles must be synchronized or compatible with the main tiles. For example: 60×60 floor tiles pair with 30×60 wall tiles; 80×80 floor tiles pair with 40×80 wall tiles; similarly, 40×40 floor tiles pair with 25×40 wall tiles.